

we made the trip to 30 together...let the new decade begin!
Wednesday, December 25
Tuesday, December 24

Sunday, December 22
handcrafted by sid
If you've never met him, you're missing out. Whether you call him Gene, Daddy, or Sid it all means the same thing...awesome! I am truly blessed to come from not only a "use your hands" family but one that drops everything and anything to do something for you.
Being one of three girls, we have learned to wait in line for Sid's great creations. Come with a drawing or an idea and he can deliver. Normally this process involves me "taking measurements" however Sid isn't a big fan of "about 62 inches" or "like waist height" so thats when a husband comes in handy!
As you walk in our [Davis] house, nearly every room has something that is branded with "Handcrafted by Gene Guertin" underneath or in a drawer. Joe's bedside table, our amazing dining room table, our wine glass bar area, and the sideboard when you walk in the front door, the desk in our office, and so many more things are products of my father's hands. Many of the things that are made for me have my one of a kind dark wood stain on them, custom mixed with love.
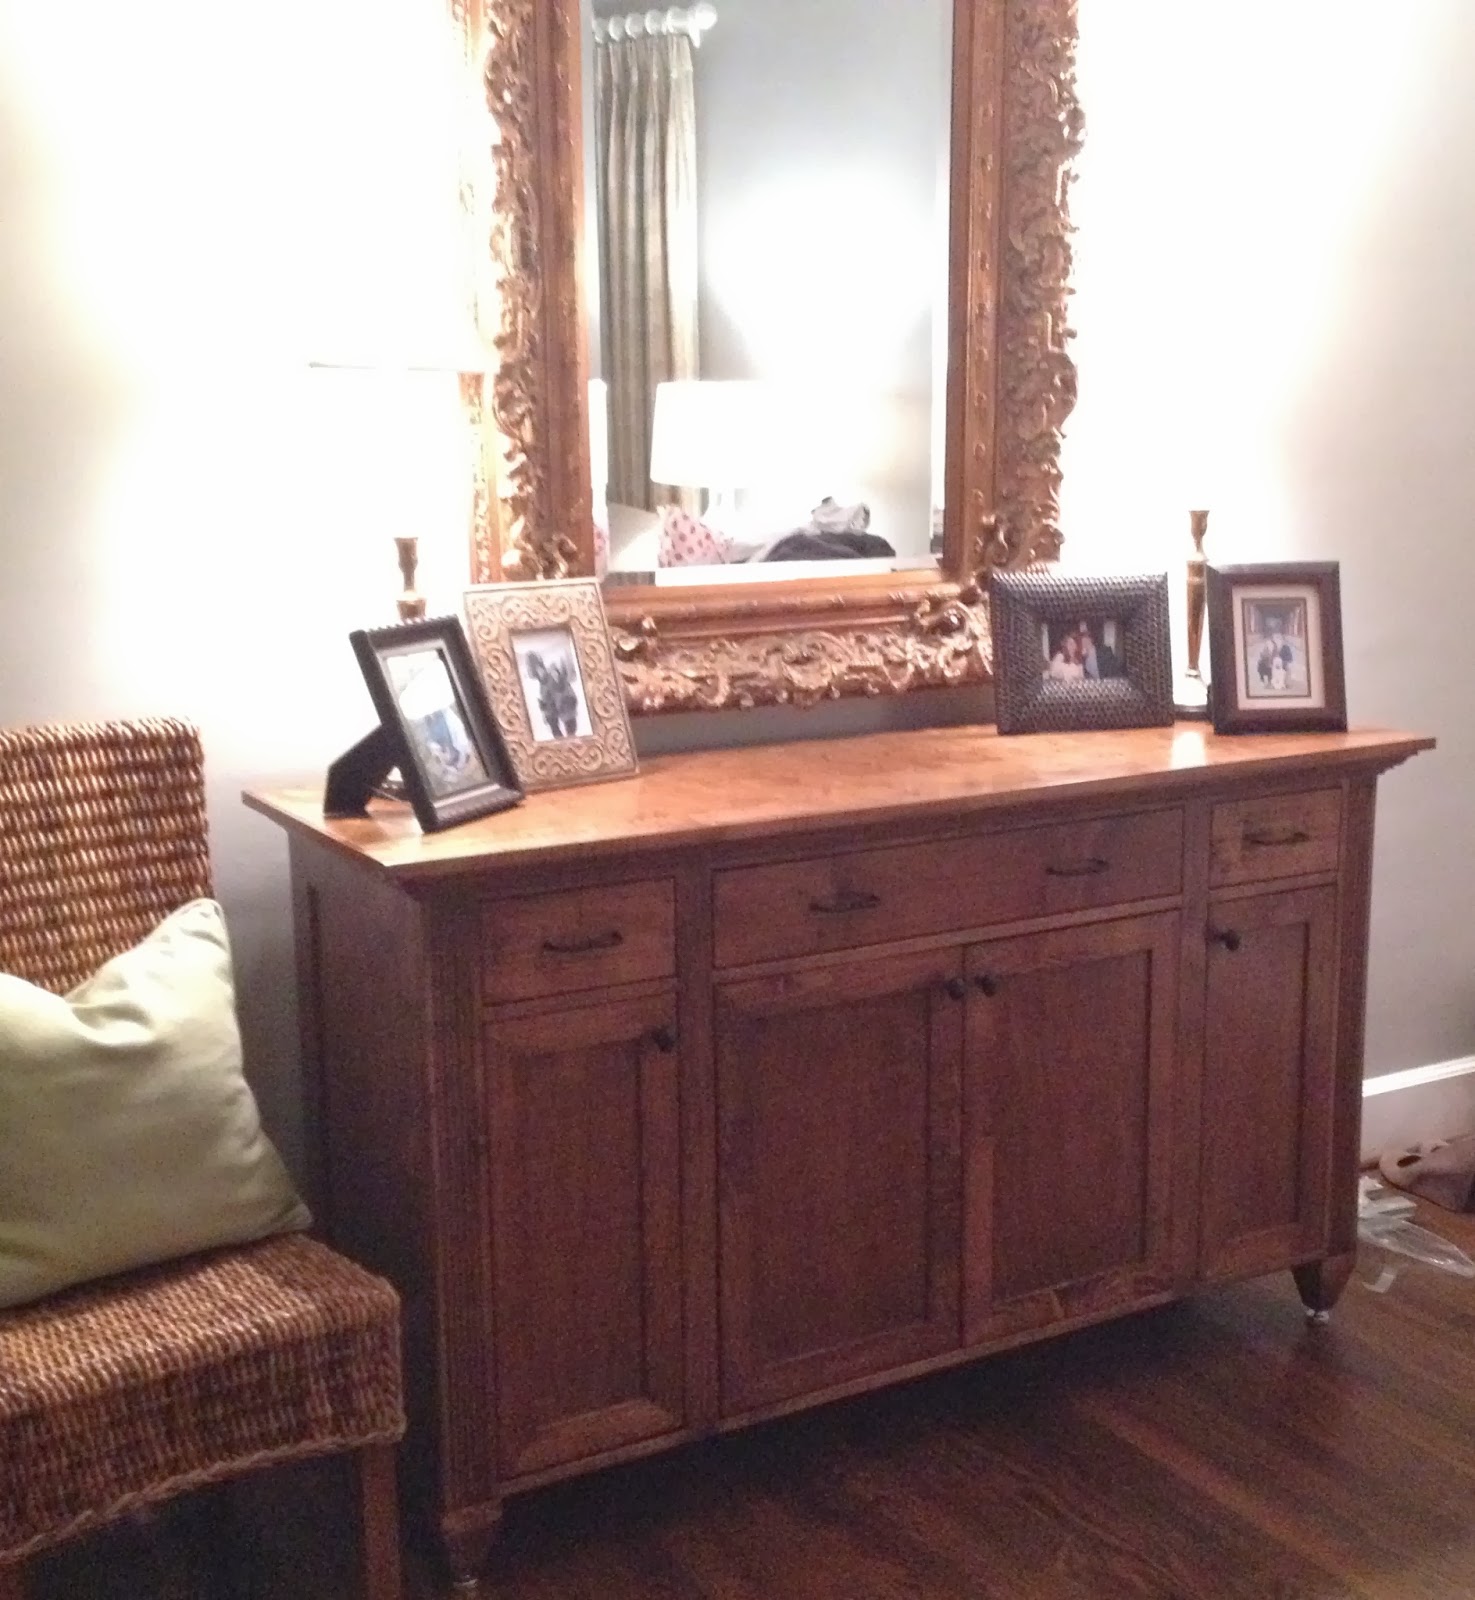
My most recent order into Sid's workshop was a new sideboard. I was inspired by something on Pinterest [imagine that ha] and although I love a good piece of painted furniture, I wanted my new lighter custom mixed finish applied. I sent Sid the Sasha Waddell piece and our measurements and boy oh boy did he deliver!

Our biggest pet peeve of the piece currently there is that of course our floors are somewhat off as many old houses are and the drawers don't seal shut so I am constantly trying to close that 1/4" gap. The current sideboard was at one point used to hold a TV and therefore had a place for baskets and other items to be seen. In our den, I'd prefer to have it all sealed off.
The first order was for soft close self sealing drawers and door hinges which even though they are nearly triple the price of the standard ones, doors and drawers will not slam or open on their own! Officially worth it!

 Custom 7 layer stain borrowed from Jenny Steffens Hobick's blog with only one change...satin poly vs. danish oil so that it could withstand the wear & tear of being in an entry way. What a great, great finish for a fabulous piece (& recipe below)
Jenny Steffens Hobick's Headboard Finish1st : Sand, Sand & Sand
2nd : Pre-Stain Wood Conditioner (Minwax)
3rd : Stain mixed in equal parts : Special Walnut, Provencal & Golden Pecan (Mixwax), brushed on and left on
4th : Special Walnut & Weathered Oak (Minwax), brushed on, then wiped off
5th : Light sand & buff
6th : **This was the step Sid changed** Minwax Satin Polyurethane vs. the Danish Oil rubbed on that Jenny originally called for
7th : Light sand & buff

The final touch was for the amazing knobs and drawer pulls that were the icing on the cake (left knob & pull from Rockler...center/right knob & pull are from Home Depot). Left knobs (matte) were the ones that were chosen to match the satin finish.
Final pieces are below!


Being one of three girls, we have learned to wait in line for Sid's great creations. Come with a drawing or an idea and he can deliver. Normally this process involves me "taking measurements" however Sid isn't a big fan of "about 62 inches" or "like waist height" so thats when a husband comes in handy!
As you walk in our [Davis] house, nearly every room has something that is branded with "Handcrafted by Gene Guertin" underneath or in a drawer. Joe's bedside table, our amazing dining room table, our wine glass bar area, and the sideboard when you walk in the front door, the desk in our office, and so many more things are products of my father's hands. Many of the things that are made for me have my one of a kind dark wood stain on them, custom mixed with love.
My most recent order into Sid's workshop was a new sideboard. I was inspired by something on Pinterest [imagine that ha] and although I love a good piece of painted furniture, I wanted my new lighter custom mixed finish applied. I sent Sid the Sasha Waddell piece and our measurements and boy oh boy did he deliver!

Our biggest pet peeve of the piece currently there is that of course our floors are somewhat off as many old houses are and the drawers don't seal shut so I am constantly trying to close that 1/4" gap. The current sideboard was at one point used to hold a TV and therefore had a place for baskets and other items to be seen. In our den, I'd prefer to have it all sealed off.
 |
| Prior piece (notice ALL the clutter on the random day we took this photo) |
 |
| new piece in daddy's workshop |


Jenny Steffens Hobick's Headboard Finish1st : Sand, Sand & Sand
2nd : Pre-Stain Wood Conditioner (Minwax)
3rd : Stain mixed in equal parts : Special Walnut, Provencal & Golden Pecan (Mixwax), brushed on and left on
4th : Special Walnut & Weathered Oak (Minwax), brushed on, then wiped off
5th : Light sand & buff
6th : **This was the step Sid changed** Minwax Satin Polyurethane vs. the Danish Oil rubbed on that Jenny originally called for
7th : Light sand & buff

The final touch was for the amazing knobs and drawer pulls that were the icing on the cake (left knob & pull from Rockler...center/right knob & pull are from Home Depot). Left knobs (matte) were the ones that were chosen to match the satin finish.
Final pieces are below!



Saturday, December 21

Sunday, December 8
frame remodel with rub n' buff
we now have two mirrors in our house that belonged to joe's family that we are so grateful to be using! the one over our sideboard in our entryway as well as the one now over our dresser in our bedroom.


the newest addition in our bedroom is a beautiful round gold mirror embellished with flowers. on either side i was hoping to find some very thin gold frames that were 8x10 and then do some mats inside them with black & white photos.
while i could not find gold frames that were not too tackily shiny or too chunky, i found thin wood diploma frames at hobby lobby (40% off $4.99) and learned from Our 5th House about the use of rub n' buff! these turned out awesome!!!
 |
| $4.99 frames from hobby lobby in a wood finish always 40% off |
i did not sand or prep the frames at all. 1st coat of gold leaf color rub n' buff applied with an old rag t-shirt. then i waited two hours and went back with my fingers and came back over some places that were not covered as well. the final step is to buff off with a clean rag to get that buffed look. no sealant needed for things like this! more photos to come when they are finished and up on the walls!!!


Subscribe to:
Posts (Atom)