
if you've ever been to our house you've see the wires (no explanation needed...see below). We've tried lots of different ways to have them more discrete which really just meant piling them up in a big basket or tacking them alongside the wall. Not to undermine the previous efforts, but our past bandaids just weren't cutting it anymore.


our house was built in the 1940s which we knew when we bought it and its always "fun" to see what you find out about as you're knee deep into an already challenging project. sometimes you need to just drill a hole and find out what's behind the wall...except for in our case drilling into plaster or wood paneling isn't always as easy to repair as patching some Sheetrock.
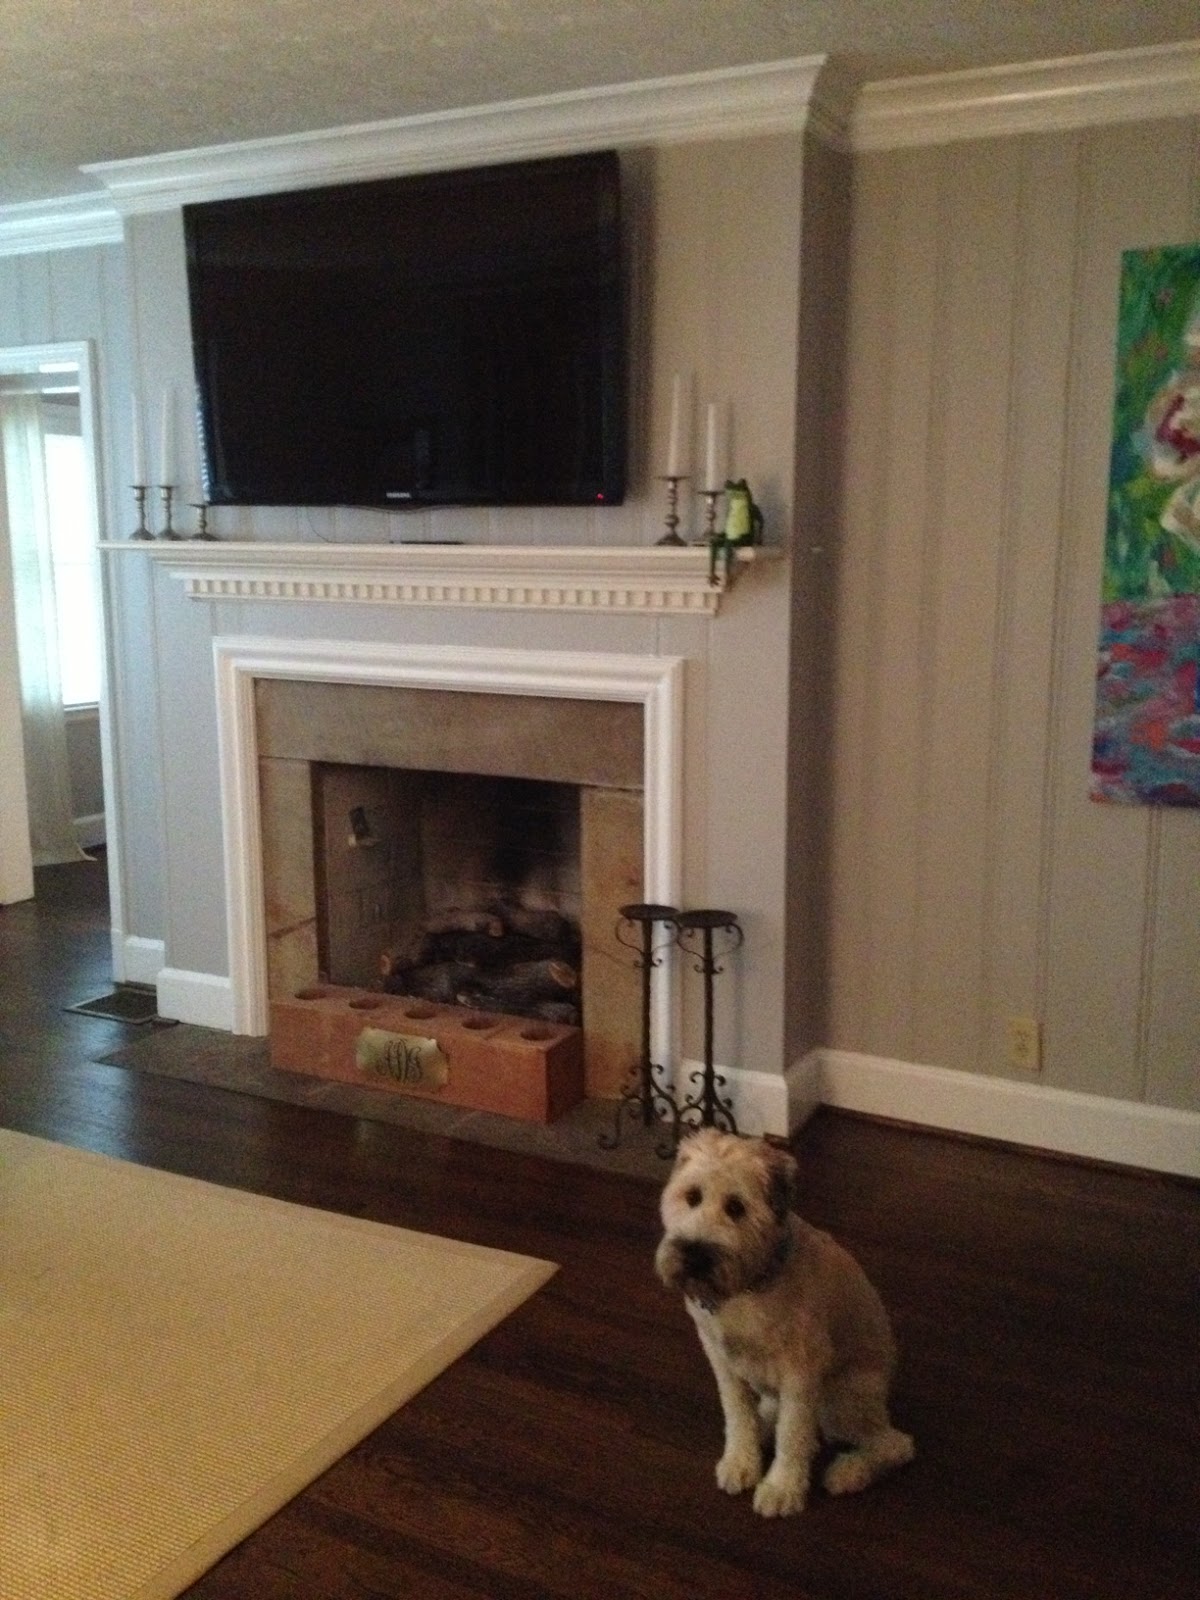
as all our projects this one started out no different...as we looked at having the wires professionally rerouted it was determined that we have our very own in house TWO wire hiding experts! The kicker for us was hanging our tv over our brick fireplace. I imagine cozzing up to a crackling fire in the winter in our 1940s house...my husband on the other hand imagines boarding it up and never bringing anything flammable anywhere near the thing. Needless to say, I was determined not to ruin the fireplace.
that being said we started investigating...what was actually behind the wall? was there a little hole we could stick a camera into and check out? as my googling lead me down many rabbit holes, it also sparked many other [unrelated] questions like, why was the fireplace in the center of our house & not on an external facing wall?! needless to say, if the fireplace was built "right" for the era which of course is never likely, there was to be 3" of space around the brick of the fireplace and the walls that it was "touching."
yahtzee! in our case, that was just it! the tv immediately came down and i'm sharing these photos and in an attempt to spark any other creative ways for others to do this themselves...everyone else out there made it seem so easy! when i speak of "day 1" or "day 2" that really is after work with a glass of wine for an hour or two versus a full Saturday of working on one set project.
the overall goal was to have the wires go from the tv behind the fireplace, around the corner, and into a little cabinet that we have in between our living room & dining room. not only do the wires have to lead to here but we need to make sure that we have our AT&T box, the battery back up for the wireless Internet, the Wii, the bluray player units all get in the cabinet properly.
first we got our safety gear on [or i did at least]...ski goggles are multipurpose

then we took the massive TV off the wall. We marked the wall with a pencil after measuring where the TV cord holes should be. HDMI and Ethernet cords were on the right, power cord on the left. Joe drilled a 1.25" exploring hole in the wall where we thought the power cord should come up. lucky us! after getting through the paneling, we hit space and sure enough if you stick a ruler in the hole, you've got 3" of void space before the bricks of the fireplace!

before the next time we worked on the tv, i did "inventory" and made sure that we had all of the wires would need in the proper lengths. we guestimated [rounding up] that we would need 110" of potential wire space to make the turns behind the wall. we also calculated how many outlets we'd need space for in the cabinet.
on day 2 we couldn't find the small hiking rope that joe was hoping to use due to its narrowness and ability to turn corenrs. however i had taken an Excedrin migraine and was on a caffeine kick & ready to work so we got creative & used wilson's [the dog] old 30ft leash that he chewed up as a puppy. using coat hangers we were able to feed the leash through the holes that we had drilled and through to the hoe in the closet making a big loop.
each wire was then taped, one at a time, to the leash and we roped it through the hole taking off the tape it at the other end. once we were through the wall, we'd label with masking tape on each end and tape it up to the wall to keep it out of the way.


after the wires were run, we went to power. joe turned off the breaker and from the hole at the top of the closet we ran power cord to the outlet already existing outlet below where we will splice [without my involvement] the power cord to power all the items in the closet.


after the wires were run, we went to power. joe turned off the breaker and from the hole at the top of the closet we ran power cord to the outlet already existing outlet below where we will splice [without my involvement] the power cord to power all the items in the closet.
 |
| all the wires are bound up neatly & hung on the wall! |
after day 2, the tv is safely back up on the wall but we are still not done! AT&T needs to come and move the ethernet wire for us so that we can get tv to the box. as you can imagine that was the hardest part!
after the AT&T wires were moved, we got the Niles infrared repeater system with the "dots" as I call them that transmit the signal to the proper place. This allows the things such as our AT&T uverse box, bluray player, & wii to be in the cabinet around the corner and transmit via their own remotes by pointing the remotes at the new dot under our TV!
Needless to say, we're all set up now!!!
Great resource for someone doing this on their own which we found after the fact: Crutchfield In Wall Wiring Guid
 |
| no more wires!!!! |


